TopAuto reader Martin daily drives a Suzuki Ignis and he has always believed that a reverse camera would make this hatchback the perfect commuter.
After spending an undisclosed number of hours looking at aftermarket solutions – ranging from cheap to expensive – he settled on a number plate casing with an integrated camera that he bought for R189 on Takealot.
Below, Martin explains the process of installing his camera and how it works.
Which tools are needed for the job?
I used basic tools such as a screwdriver, pliers, a metal coat hanger, a cable cutter, cable ties, and electrical tape.
What are the steps?
I would say the most important step to start with is planning.
You will need to figure out how to feed the camera’s cables from the boot lid to the rear of the infotainment system to hide loose wires that would otherwise be lying in the cabin.
In my case, I routed the wire under the left side of the roof lining, down the A-pillar, and behind the glove box to reach the back of the infotainment display.
To physically install the camera I then needed to remove the interior boot-lid panel of the Ignis to access all the plugs and wires for the reverse lights, and to remove the old number plate casing from the inside.
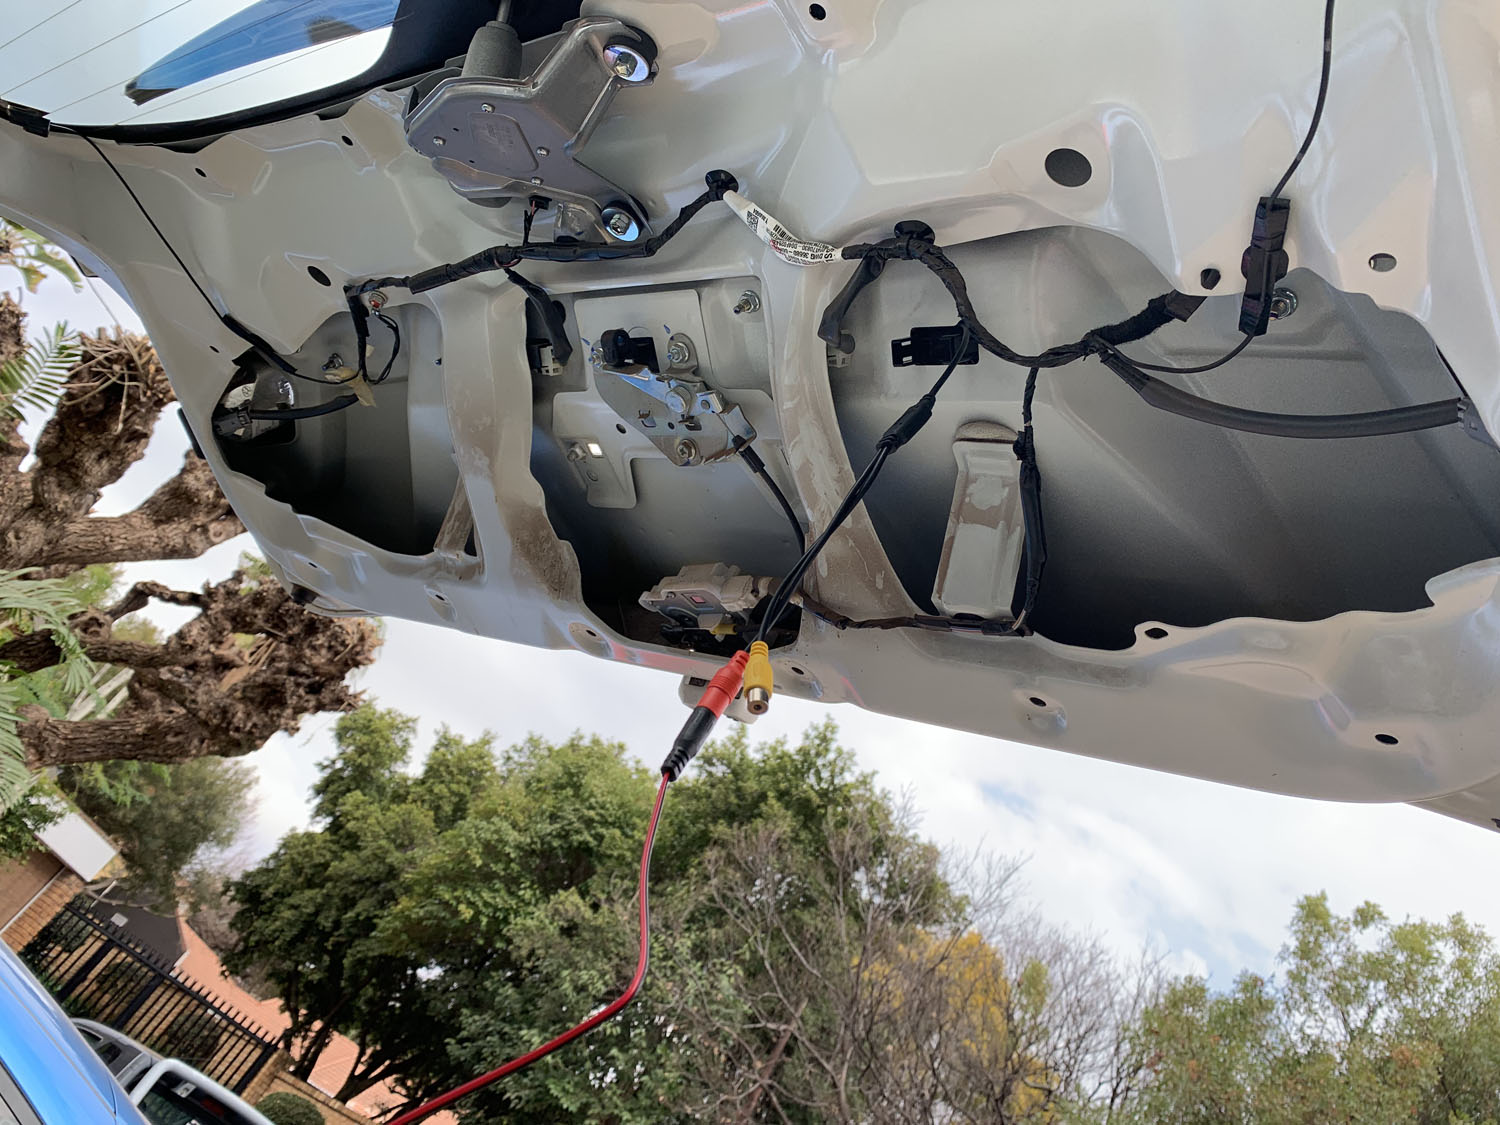
The included instruction manual then provided a diagram that depicted two ways to connect the camera to the car.
Not being too keen on cutting any cables on my car, I opted for the simpler solution of replacing one of the two wires that were already attached to the reverse light with a cable to the reverse camera.
This cable was then plugged into the “R.C in” port on the back of the car’s infotainment system, and the camera was up and running.
The original energy-delivering cable now powers both the rear lights and camera when the reverse gear is selected, while a data-delivery cable displays the camera feed.
This ended up working well and saved me from an embarrassing trip to the Suzuki dealership.
How did it all fit?
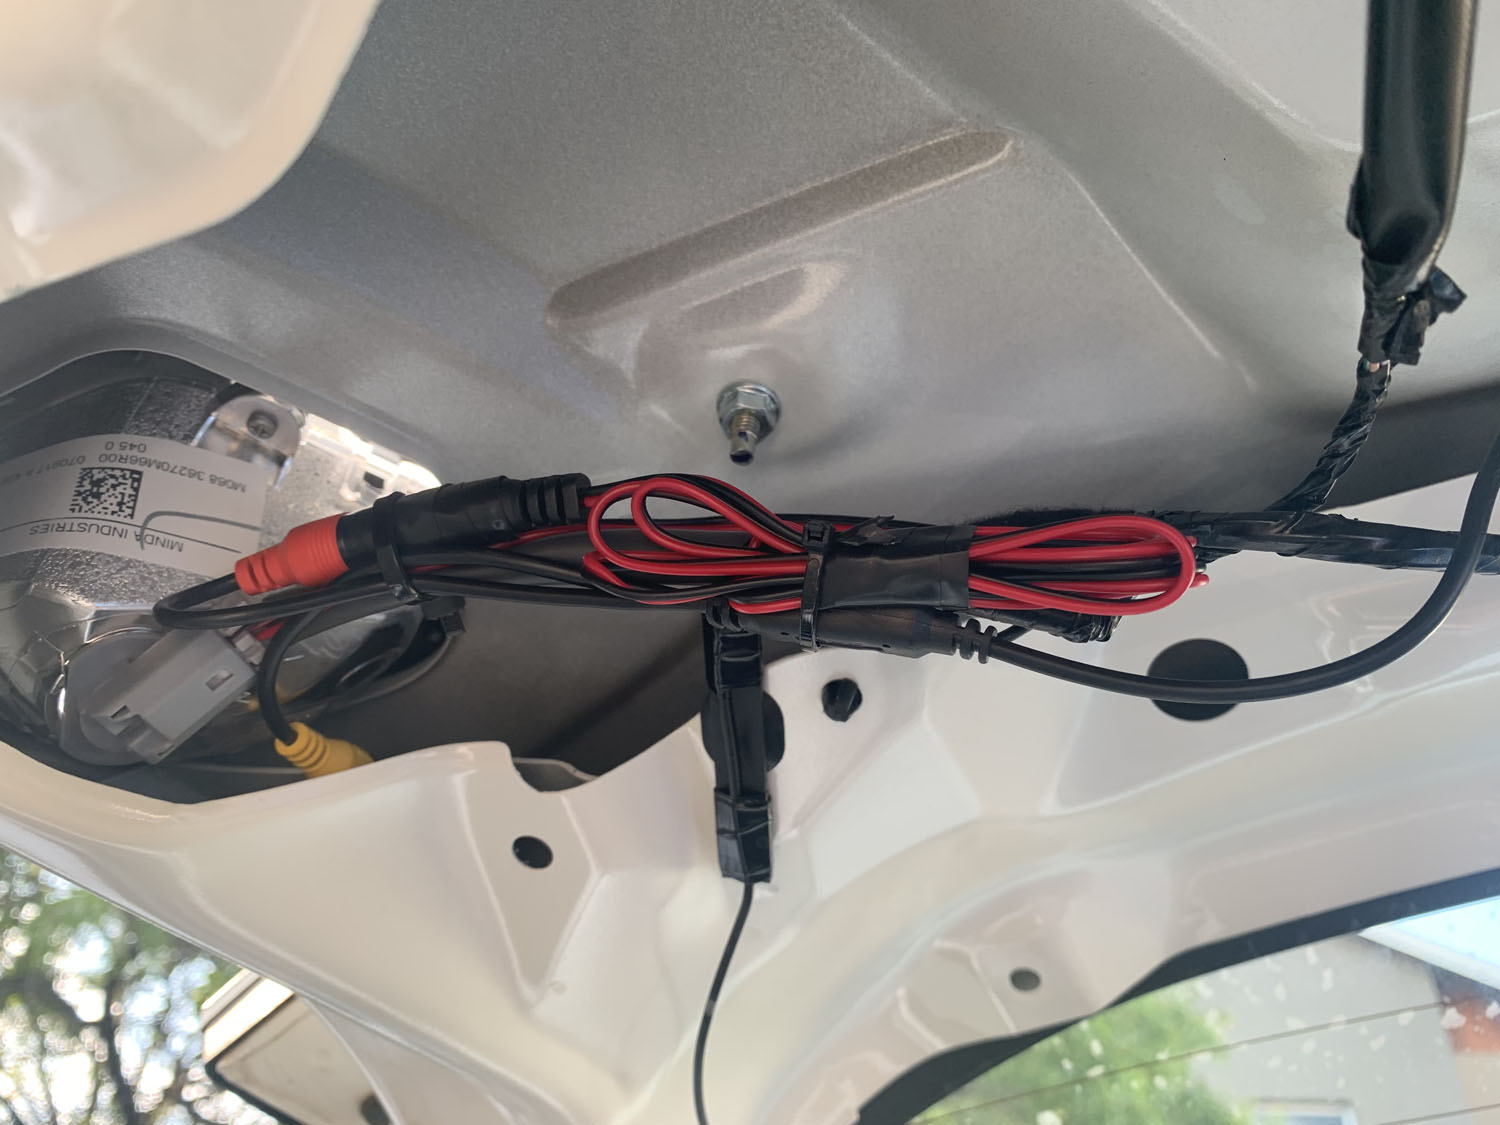
The cabling was the easy part, and the hard work began with the new number plate housing.
I soon realized that the aftermarket number plate casing was too large for my Ignis, and that the outside boot handle was completely blocked off when installed.
This led to me removing the camera itself from the casing and sticking to the back of the car with double-sided tape – and the whole process of cable management being repeated.
The negligible weight of the small camera unit convinced me that this will be just fine during my daily trips, and I have been right so far.
A few pieces of electrical tape and cable ties later, and the remainder of the loose cables throughout the interior were tidied up.
All that was left was to clip back the interior panels and reattach the original number plate. The entire process was finished in just under two hours.
I now have a camera input option on my infotainment display every time the reverse gear is selected.

Are you satisfied with the result?
Yes, I am happy with the outcome – despite the final product performing “averagely”.
The virtual reversing “guidelines” are high up in the air and offer no real benefit – and the visual feed is black and white, rather than in colour.
These are minor issues, though, and they are easily overlooked when I back my Ignis into a parking spot without having to stretch my neck.
Online reviews of the same product also make it seem like I am the only person with these problems – so the camera system might not be to blame.